Wednesday, June 29, 2011

Homemade pizza sauce

In case you haven't read my ramblings in my last post, homemade pizza is my new favorite meal! Beware if you are coming over for dinner soon. :) My last post was about easy, delicious homemade pizza dough. This is the recipe for my pizza sauce- which is adapted from Jessiker Bakes. You can change it up to add your favorite spices too. Its so easy, SO much cheaper than a jar of sauce and ready in 10 minutes or less. I will never buy my own pizza sauce again! :)


Monday, June 27, 2011

Easy Homemade Pizza Dough

As usual, I don't know what it has taken me so long to share this recipe (original recipe from My Baking Addiction, combined with Baked Bree's method) with ya'll. This homemade pizza dough is my new favorite thing. In fact, I've made two batches already! It takes literally 1 minute to prepare and then you just let it rise while you run errands. The dough is so flavorful and the taste of homemade pizza is 1 billion times better (and cheaper!) than any frozen pizza or even Papa Johns- you will just LOVE it too, I know! Even if you've never baked with yeast before- please try it! You don't need any special tools except a rolling pin & some parchment paper (or a silpat mat).


The possibilities are endless with pizza. Use red sauce. Use white sauce. Use olive oil and garlic. BBQ Sauce. Peanut Sauce. Any of your favorite toppings. I made my own pizza sauce that was so easy and fabulous- recipe here.


I also LOVE a white pizza with olive oil, crushed garlic and white cheeses.


I cannot wait to try them all. The other wonderful part about this dough? You can keep it in the fridge for about 12 days- it freezes well too. Once you have the dough made, it only takes 10-15 minutes before you have a hot, fresh pizza on the table.

Friday, June 24, 2011

Mini Dougnuts- Party in Your Mouth!


You may remember that for my birthday back in April, my little brother sent me the lovely mini doughnut pan and cupcake pen.


 I FINALLY got around to using them. I really should have made these sooner. They are SOOO good. The recipe is simple (from Freida Loves Bread), but the nutmeg is what make these taste like "real" doughnuts- don't skimp! They are just so cute. They are the perfect thing to impress your guests with.


I added some thawed frozen blueberries to the third batch- very yummy! These would be great with chocolate chips too... Next time I'll experiment more. :)

Wednesday, June 22, 2011

Indian Curry (Kinda like Tikka Masala)


I debated whether or not to post this recipe. It was good, but it just did not have enough spice for me- I like a little more kick, whereas this was a little sweet. Also, it just didn't taste like a dish for which the chicken had been marinating for 24 hours. I really wasn't too impressed overall, but hey, you might like it! If I make this agian, I think I would add a lot more Tikka Masala spice (which, by the way, I had a hard time finding- ended up locating at Central Market in the ethnic food aisle). Another really good Indian dish was this Indian Butter Chicken- it had a lot more spice.


Monday, June 20, 2011

Gavin


I have a new buddy! OK, he's not mine, but I am basically a surrogate auntie to this sweet dog. G adopted him from Ausitn Pets Alive last week. Now they are best friends.


Before that he was in and out of the Austin Animal Shelter. And before that he was a Katrina rescue dog. It is so nice to know that his life has truly been saved! For those of you wondering, we were told that Gavin is a German Shepherd/Chow Mix. You may have noticed his blue tongue that is a signature feature of Chows!


Gavin is very docile, well-tempered and mostly well-behaved (occasionally he thinks the couch is more comfortable than his bed)! We think he is 7 years old and he is very well trained.


He loves to sleep, grumble, ride in the car, and run in the park-especially through sprinklers (while trying to bite the water)- what a perfect companion! haha

If you are living around Austin and looking to adopt a dog, I highly recommend Austin Pets Alive. They are dedicated to saving cats and dogs who might otherwise be put down at the Town Lake Animal shelter due to overcrowding.All the people there seemed to know Gavin and love him- how special! :)


Image and video hosting by TinyPic

Friday, June 17, 2011

Triple Layer Cookies & Cream Crunch Brownie Bars


I'm going to tell you right off the bat, these are DANGEROUS! I'm warning you that if you make these you will need to find them a new home right away. Keeping them in your fridge will only make you sneak a piece after every meal. Even breakfast. Don't say I didn't warn you!


I didn't know there could be such a delicious combination of oreos and chewy brownie and melted chocolate and peanut butter and Oreo crumbs (did I mention that?). I really like that its cold. Its freaking amazing! :) Danger #2- you will not get rid of an entire package of oreos with this recipe. You will have to make it twice.... I hope you have a bake sale or something, for your own sanity!


Wednesday, June 15, 2011

Super Easy Lemon Pepper Green Beans


I needed a good green bean recipe STAT. Thank you, AllRecipes! Can you imagine being so focused on the main dish that you forget about the side dishes? Does anyone ever give you a quizzical look when you offer up BBQ chips as a side dish?

Green Beans to the resuce!

 This tends to happen to me a lot. I forget about the sides! Luckily I had some frozen green beans and this recipe was super quick and delicious. It was even complimented! :) The original recipe had some sliced almonds in it too, but I made it without and it was just as good!

Monday, June 13, 2011

Grilled Rosemary Ranch Chicken


I don't know about you, but I've been craving a lot of grilled chicken lately. I love a fresh-herby grilled flavor! I specifically love rosemary and I came across this recipe, which is fabulous! It has a lot of flavor and makes for some very tender chicken! The original recipe is for kabobs, which I'm sure are great too, but I just wanted chicken breasts.

And actually, I made these on Memorial Day and the grill at my complex was PACKED. I ended up baking this in the oven and it turned out great (probably even jucier since I cooked it in the extra marinade).


 This would be perfect for a summer BBQ though- I hope you try it soon! :)

Friday, June 10, 2011

Garlic Butter Yeast Rolls- Oh my goodness!


If you've read my blog before you know I'm just a teensy bit obsessed with Bree's blog, Baked Bree. I bookmark 99% of her recipes and they are always delicious. I was looking for a reason to make these rolls for a while. I've made cinnamon rolls many times and when Bree discribed how amazing, buttery, garlicky and pillowy these savory versions were, I searched for the perfect recipe to pair them with. I ended up making her Indian Butter Chicken recipe (also fabulous) and made these rolls in lieu of Naan bread. Perfection. The great thing about these rolls (besides how easy they are to make) is that you can freeze what you're not using right away and just place in the fridge the night before you want to make them. Take them out and let them sit at room temperature for 45 minutes while the oven heats. If you make these for guests, beware. They will want these every time they come back to your house!


Wednesday, June 8, 2011

Indian Butter Chicken


I am not normally a big Indian fan, but I decided to try this recipe after bookmarking it a while ago on Bree's blog. I'm so glad I did. All the spices give it such a rich flavor that is perfect with some Basmati rice. Don't be overwhelmed by the amount of spices. I just went to Central Market and stocked up in the bulk section. It's SO much cheaper. This dish isn't spicy if you completely seed the jalapeno, but you can make it spicier by leaving some of the seeds in. Also, don't be silly like me and remove the seeds with your fingers. Your finger tips will burn for about 6-8 hours....


 Yum. I'm looking forward to making this again! 


I decided to make it with these homemade garlic butter rolls- the perfect companion! Recipe here!


Monday, June 6, 2011

Hot Onion Souffle- Perfect Party Dip


Wow. I was looking for this recipe on my blog to link up to Kelly's Korner- Show us Your Appetizers, when I discovered that I never actually posted it! ha. I made it back for the Super Bowl and its SO delicious. This is a hot, baked dip that is always a HUGE hit. It goes really well with Frito's corn chips (get the scoop kind). It's not exactly the most healthy dip but I usually get fat free/low-fat cream cheese and mayo and no one can tell. :)

Hot Onion Souffle Dip
  •  24 ounces cream cheese, softened to room temperature
  • 2 cups Parmesan cheese
  • 1 bag (12-14 oz) frozen chopped onions, thawed
  • 1/2 cup mayonnaise
  1. Place thawed onions on a place and absorb all excess moisture with paper towel.

Mix all ingredients in a large bowl.


Spread evenly into baking dish with lid. 


The larger your dish, the more crispy areas you will have. :)


Bake at 375 for X-X until top is slightly browned.


Serve hot with Fritos scoops.

Enjoy!


Thursday, June 2, 2011

My New-Old Gadget and The Best Ever Strawberry Layer Cake

To keep you from skipping to the end of this post, here is a sneak peak of what all my jibber jabber leads to:


 When I made it back to NOLA 2 weeks ago, I received more than one request to make a batch of 
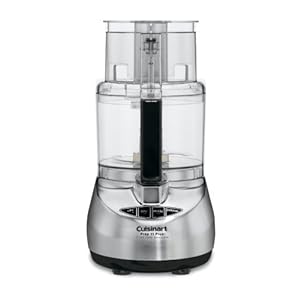
Sprinkles Strawberry Cupcakes that had been spotted on my blog by a few family members. I was happy to oblige- only one problem- I needed a food processor to puree the strawberries. At home (in Austin) I have this tiny and cheap version. It gets the job done, eventually...


Mom said not to worry- she DID have a food processor. WHAT?! She had been hiding it from me all this time?! I felt betrayed. My close friends and family know I've been eyeying this delicious little darling for quite some time.

Cuisinart Prep Plus

So what is the delay you might ask? All of my kitchen cabinets are currently refusing to house anymore tenants. I'm hoping to add this permanent resident after I move to a new apartment later this Fall. I figured I could wait until then. Then this brand-new-but-also-very-experienced and vintage-looking version founds its way out of my mother's cupboards for the first time in 24 years.


Let's be clear- its not like she NEVER used it. She tried to make me baby food. Once or twice. Apparently that didn't go over too well. Did I mention it was a wedding present? Even though it looks aged, "she" is actually a very nimble worker! My mom said I was welcome to take her back to Austin since she was not getting any exercise in her kitchen. The only hiccup on the way back was the small extra screening it required in the airport security line. I guess most people do not bring 30 year old kitchen appliances in their carry-ons. I know what you're thinking- did you really think I would pack the blade attachemnts in my carry-on too? I'm not that silly. Those made the journey safely wrapped in bubble wrap in my checked bag.


Eventually, I'll probably get my newer version and return this one to my mom's house so I can have one to use while I'm home. Oh- and no- the other kitchen tenants have not moved out. This little old lady is currently residing in my closet. Hey- she likes shoes.

Scroll back up. See all those strawberries in there? They made a very delicious cake- the BEST EVER Strawberry Layer Cake to be exact.


Ta Da! I just doubled the recipe for the Sprinkles Strawberry Cupcakes since I wanted to make a more formal cake and it was perfect for a 2 layer cake. I will re-post the recipe below so you don't have to use your math skills today! But I'm serious about this one. Everyone said it was the BEST cake they'd ever eaten. It has the perfect amount of strawberry flavor and sweetness. Its light and airy and perfect for summer.

The Best Ever Strawberry Layer Cake


For the cake:
  • 2/3 cup fresh strawberry puree, (about 1 1/3 cup strawberries roughly chopped- thaw if frozen)
  • 3 cups AP flour, sifted
  • 2 tsp baking powder
  • 1/2 tsp coarse salt
  • 1/2 cup whole milk, at room temperature (I used half skim milk and half cream, since that's all I had)
  • 2 tsp vanilla extract
  • 1 cup (2 sticks) unsalted butter, room temperature
  • 2 cup sugar
  • 2 large eggs, room temperature
  • 4 large egg whites, room temperature
  1. Set out all ingredients until they are at room temperature. Preheat oven to 350. Line 2 8 or 9 inch cake pans with a circle of parchment paper (to avoid chew edges) and spray with cooking spray. Set aside.
  2. Puree strawberries in a small food processor until smooth. You will need 1/3 cup puree for the batter- set aside. Save remaining for the frosting. 
  3. In a medium bowl, whisk together flour, baking soda and salt. It is important that the flour is measured after it is sifted, not before. 
  4. In a small bowl, mix together strawberry puree, milk and vanilla. Set aside.  
  5. In a mixer bowl fitted with the paddle attachment, cream butter on medium-high until light and fluffy. About 2 minutes. Gradually add sugar until well combined and fluffy. 
  6. Reduce speed to medium and slowly add egg and egg whites until just blended. The egg whites make the batter nice and fluffy. 
  7. Reduce speed to low. Add half of the flour mixture until just combined. 
  8. Add the milk mixture until just combined. 
  9. Add remaining flour mixture until totally combined. Make sure you are stopping to scrape the sides of the bowl as needed.  
  10. Divide batter evenly among cake pans and smooth tops. Tap on counter to settle. Bake for 25-30 minutes until tops are just dry to the touch and toothpick comes out clean.
  11. If you are in a hurry for them to cool, cool them on a wire rack for 5 minutes then place in the freezer/fridge while you clean up and make the frosting.  You will need to cool completely before frosting.
 
 
For the frosting:
  • 4 TBSP STRAINED strawberry puree (about 1 cup roughly chopped strawberries, roughly chopped)
  • 4 sticks (2 cups) unsalted butter, room temperature
  • 2 pinches of course salt
  • 7 cups confectioners sugar, sifted (measure the sugar AFTER its sifted)
  • 1 tsp vanilla extract
  1. Puree strawberries. Press through mesh strainer to remove seeds. Set aside 4 TBSP of seedless puree. This takes a few extra minutes, but its totally worth it! You do not want the seeds in the frosting.
  2. Beat together butter and salt at medium speed until light and fluffy, about 3 minutes. 
  3. Reduce speed to low and slowly add confectioners sugar a little at a time until well combined.
  4. Add vanilla and strawberry puree. Mix until just combined, scraping sides as needed. Do not over mix or the frosting will incorporate too much air. It should be dense and creamy like ice cream.  
  5.  Place one cake upside down on the cake plate (usually the bottom is more even) and place a large dollop of icing on top. Spread frosting as evenly as possible. Ideally, you would freeze for at least 15 minutes, but I did not have time.
  6. Place second cake upside down on top.Repeat icing the top, pushing extra icing onto sides. Slowly rotate the cake, smoothing out the sides and the top, filling in holes as you go. If you have time, flash freeze again.
  7. Once it looks as good as its going to get (I had hungry people waiting on cake), spoon remaining frosting into icing bag with desired tip (in this case, a ziploc bag with the corned cut off). Do not fill the bag more than 3/4 full or it will come out of the top too! Pipe around the top and bottom to make your cake look pretty. Your guests will be impressed that you thought of this. You can take the credit. 
  8. Keep cake refrigerated. It will last for a few days, if in an empty house. :)


Oops- mine got a little melty in the middle since I did not freeze in between layers, but nobody complained!


I really thought it was a pretty cake so I took a few more photos.


Enjoy!

Image and video hosting by TinyPic
Related Posts Plugin for WordPress, Blogger...